Twenty-seven days after I placed my order, the Kyria kit finally arrived.
I had ordered the acrylic plate case, and the tenting pucks, and I had made my own aluminum bottom plate, but – not knowing anything about keyboards – I didn’t really understand what I was buying.
Actually getting my hands on one revealed a few things.
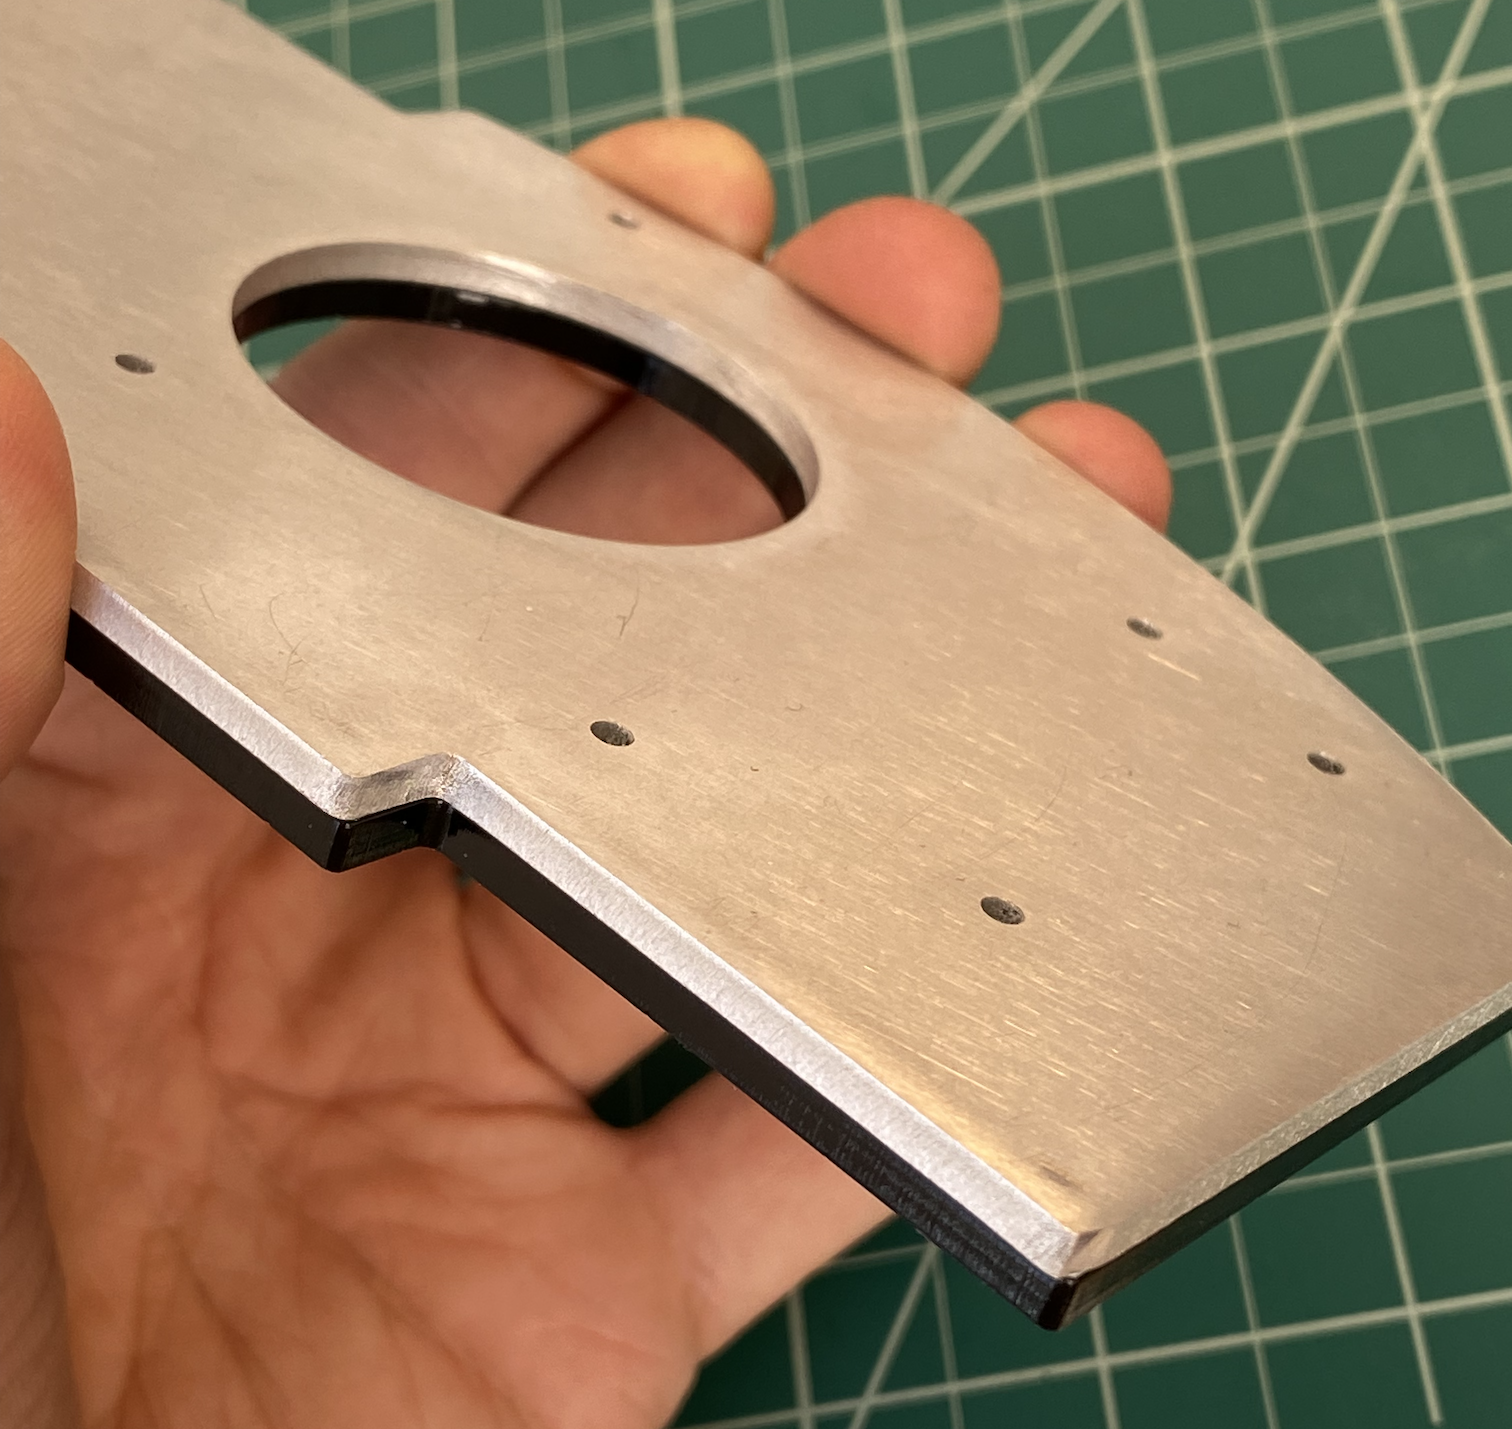
First off, the aluminum plate that I made was an exact, perfect substitute for the acrylic plate. It really worked. It was great.
However, I quickly realized that it wasn’t very useful.
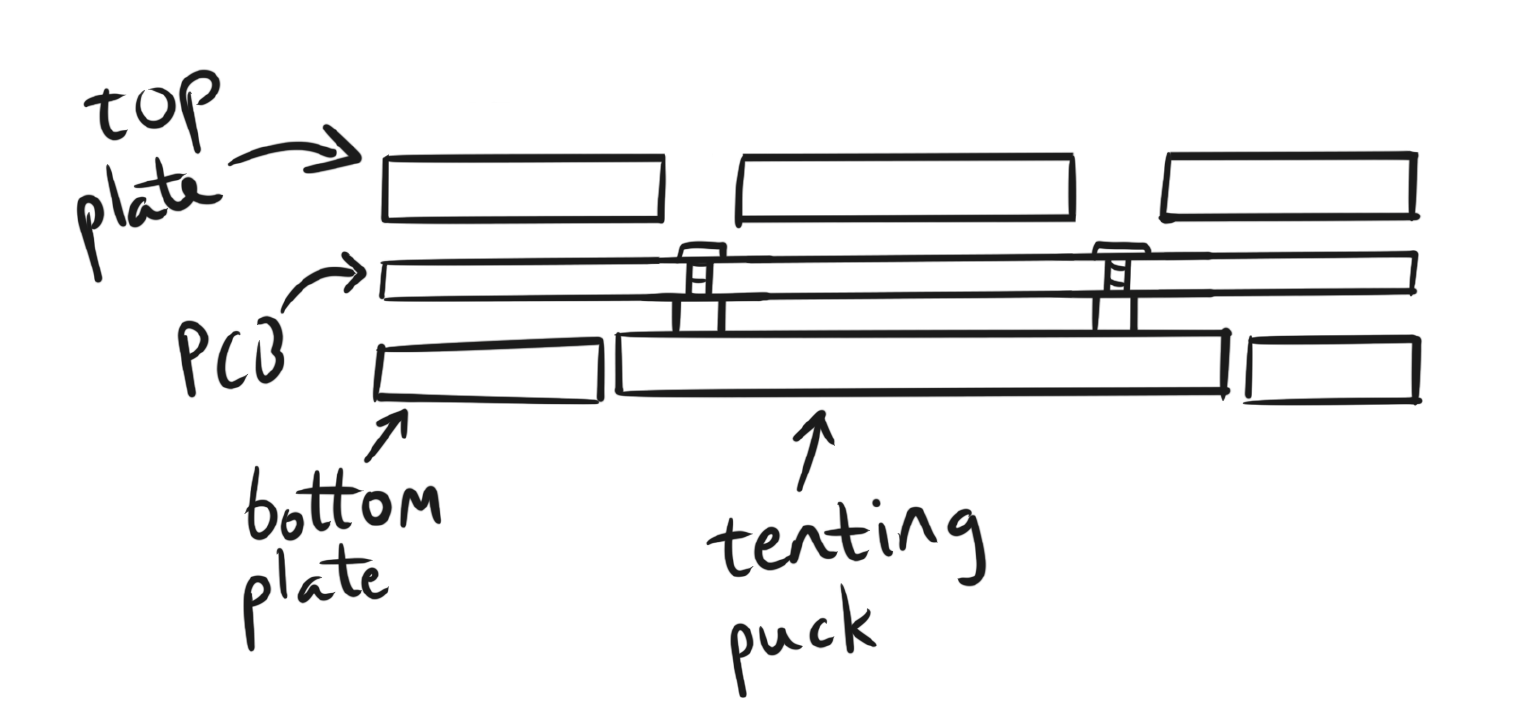
See, I had thought that the tenting puck attached to the top plate. And I thought that by adding a stiff bottom plate – which is connected by standoffs to multiple points on the top plate – I would end up with a stiff final result.
But this was completely wrong.
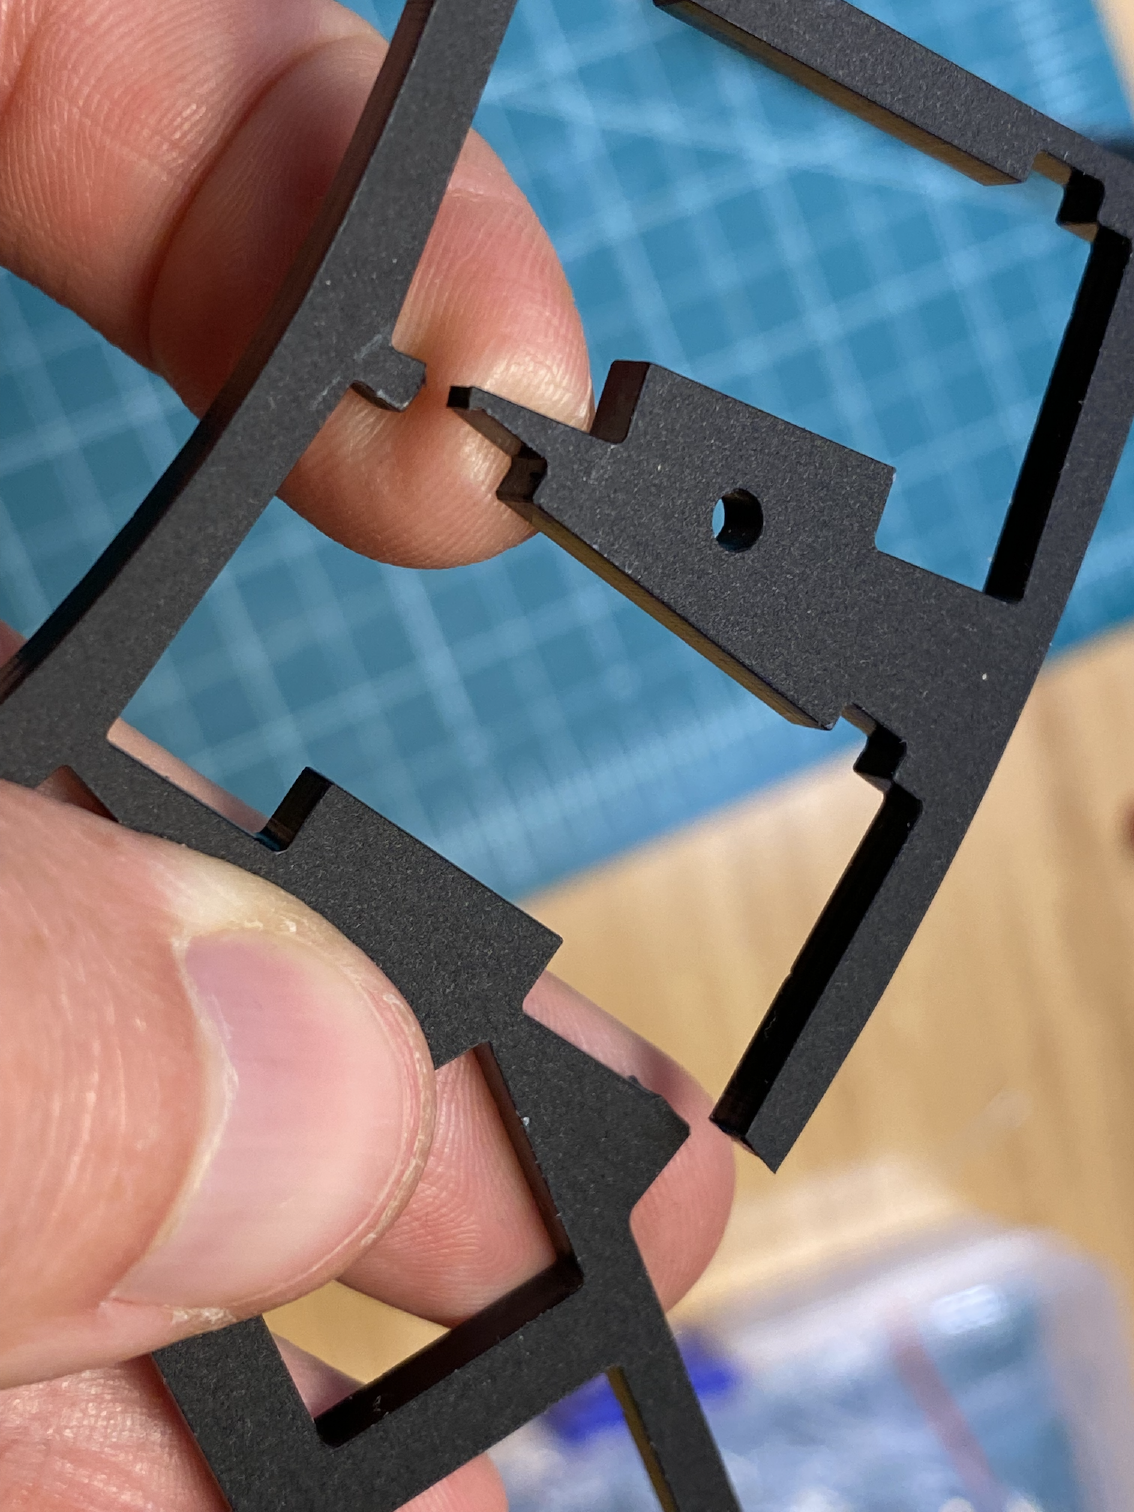
The tenting puck doesn’t attach to the top plate: it attaches directly to the PCB. And the PCB doesn’t attach to the top plate or to the bottom plate, except indirectly through the solder joints in the switches.
This is how I thought the tenting puck worked:

But this is how it actually works:
I suspect this is because there’s no room to put switches if you attached the puck to the top plate, because the screws would get in the way. You’d have to countersink the screw heads in order to fit them flat against the plate, but these are laser-cut cases, not CNC-machined cases. You can’t countersink with a laser cutter.
You also can’t countersink a plate thinner than your screw head.
Which brings me to the final realization:
3mm plates are too thick.
So this is known, I guess, and obvious if you’ve ever built a keyboard before. But I didn’t really think about it. I didn’t really realize what the point of the plate was or how they worked until I saw one.
So this is how plates are supposed to work:
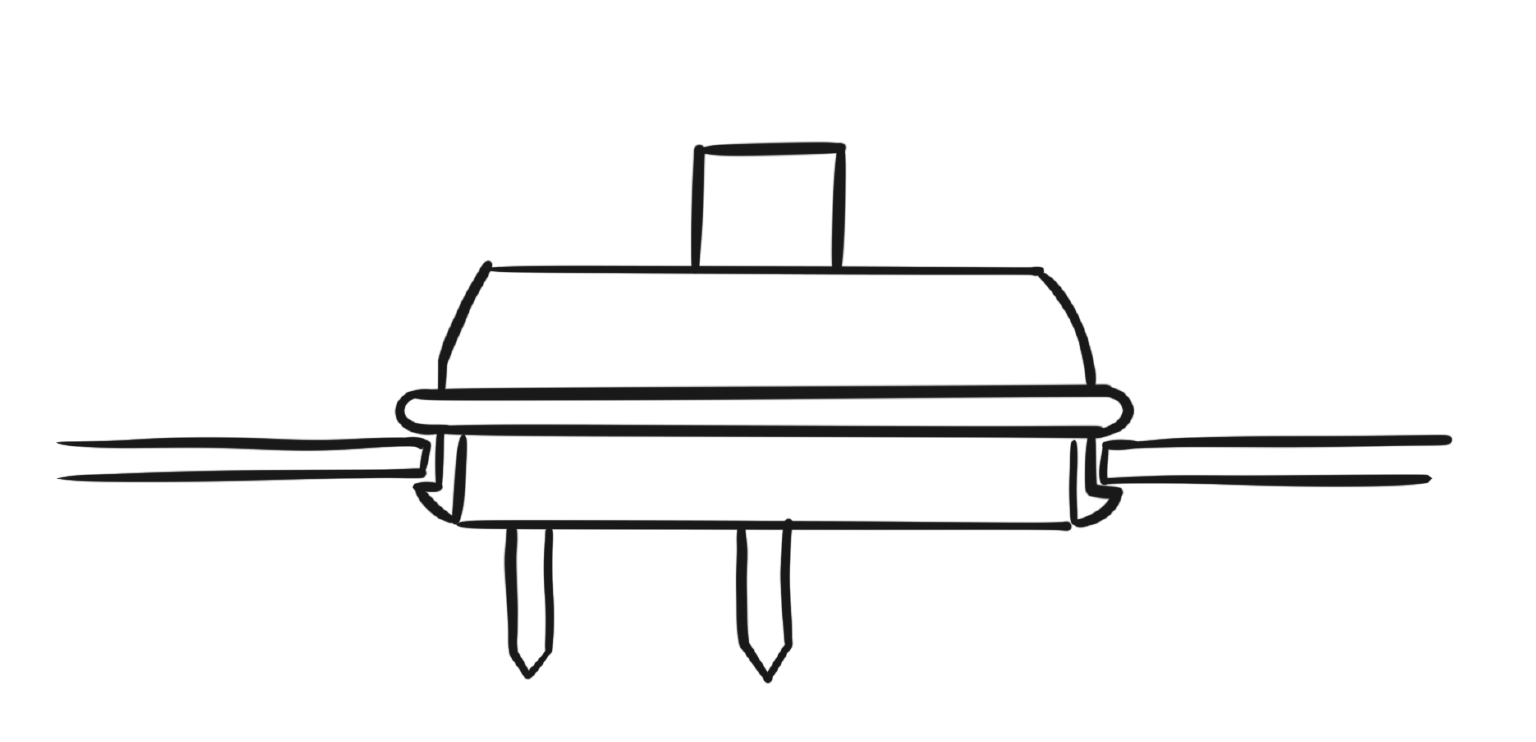
Switches have these little plastic tabs on the sides of them. If you put a switch into a hole, the tabs will compress inwards, and then pop into place. You can pull the switch back out, if you want to, by squeezing the tabs back in. But otherwise they’re pretty locked in.
But if your plate is too thick…
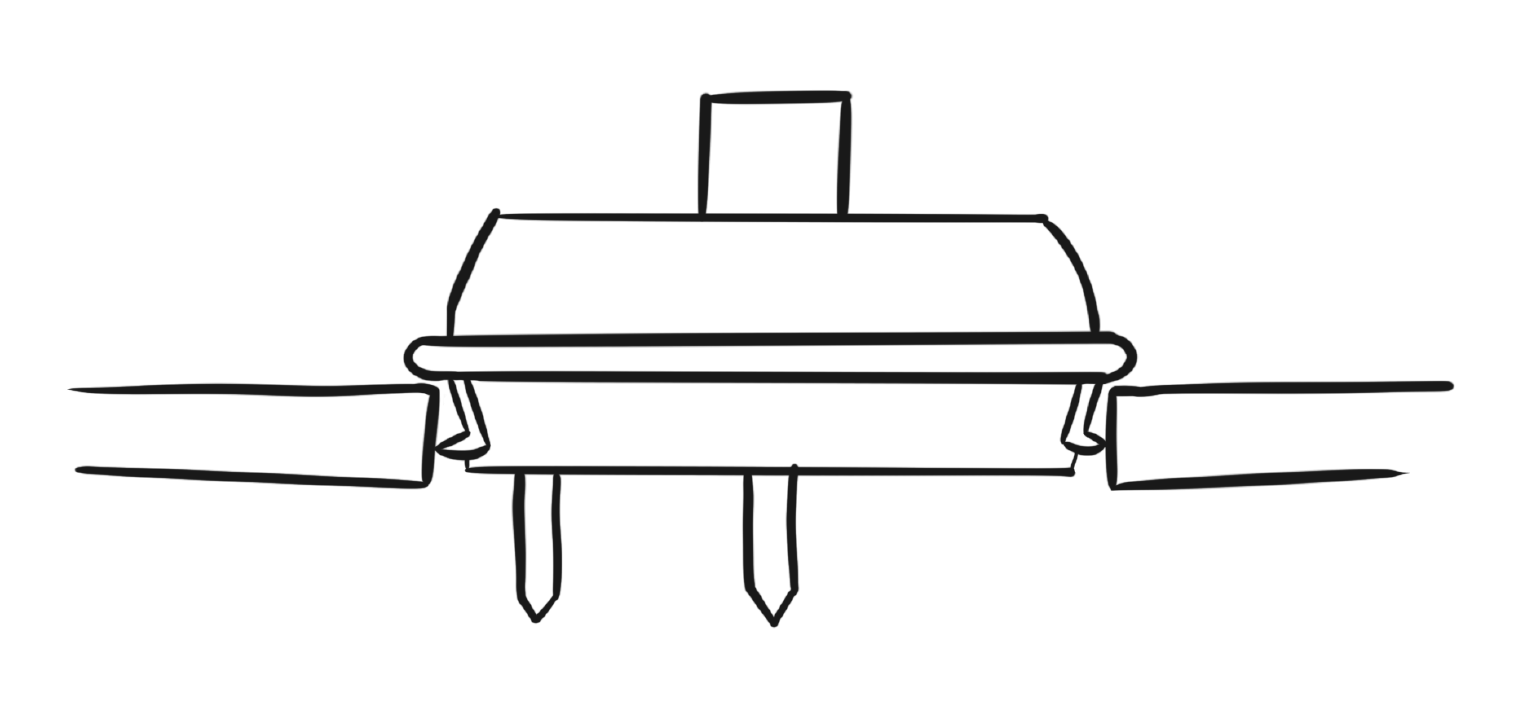
Then the tabs stay compressed. They don’t pop; they don’t lock. They’re held in place by friction, and they stay in pretty well – as long as you don’t touch them from the bottom. It’s pretty frustrating to try to install multiple switches in this plate, though – the slightest bump on the bottom of one of them will send them flying out, and you can’t set down the plate or they’ll all come out at once.
Now, obviously the Kyria case works, and lots of people have built Kyrias and this is probably a non-issue. But the only thing holding the switches in place – the only thing counteracting the force of the spring-loaded tabs – is the solder joints.
How strong are solder joints?
I have no idea. Presumably quite strong, if you know what you’re doing. You’re basically welding metal, after all.
But I had fear in my heart. I had never soldered anything before, and I didn’t feel very good about my keyboard’s structural integrity depending on the strength of my solder joints. Especially with the tenting puck transferring all force directly to the PCB, and especially with the force required to pull keycaps off of Choc switches… I decided that I would rather have a proper top plate.
So I set about making one.
Er, paying someone else to make one for me. Spoilers: I’m going to use SendCutSend again. SendCutSend passed the test.
One more thing
Okay, so everything that I said was true, regardless of the following thing that I’m about to say:
One of my acrylic top plates arrived broken.
It was snapped in two places, where the acrylic is quite thin.
I was not really bothered by this, because by the time I realized it was broken I had already decided to go with a steel top plate.
And I’m am not, to be fair, 100% sure that it arrived broken. I didn’t notice this until a few days later, when I took the backing tape off of the acrylic. It’s possible that I broke it by… removing the tape too hard? Or that I snapped it by… I don’t know. Maybe I stuck a switch in while testing it, and cracked it without noticing because the backing tape was holding it together? I have no idea. I think it arrived cracked, but I can’t swear to that, and anyway it doesn’t matter.
I don’t think of acrylic as being particularly fragile at room temperature, but those are pretty thin pieces. I was curious how fragile it actually was, and if it would be possible to break the plate by exerting reasonable force – say, pushing a switch in too hard.
So I broke the other one too.
As you can see, I didn’t break it in a very controlled manner. I didn’t measure the force required to break it. I just snapped it off.
So you’ll have to trust my subjective analysis: it was pretty easy to break it. I used a lot more force than I’d use while, say, typing, but a lot less force than I’d use while fitting a switch into a slot. But, then again, I applied the force in a pretty unrealistic manner, bending it specifically along the weakest point I could. So I dunno. None of this is in any way scientific, and I only had the one spare plate, so I can’t try anything better now.
In any case it’s pretty easy to glue back together, so this doesn’t really matter anyway. But if you do build with an acrylic case: be careful with it, I guess.