So I decided that I didn’t like the design of the Kyria’s tenting puck, and would rather have something sturdier. And I really didn’t like the spring-loaded switches in the 3mm top plate – I wanted a “real” plate to snap my switches into.
I did not actually assemble the keyboard as-is, though, so I’m not claiming that it’s fragile or anything. I was worried that I could drop it and send switches flying off of it, but this is purely an Ian worry. Remember that I don’t know anything about soldering or keyboards, so take all this FUD with a large pyramid of fancy finishing salt.
So: the standard Kyria top plate looks like this:
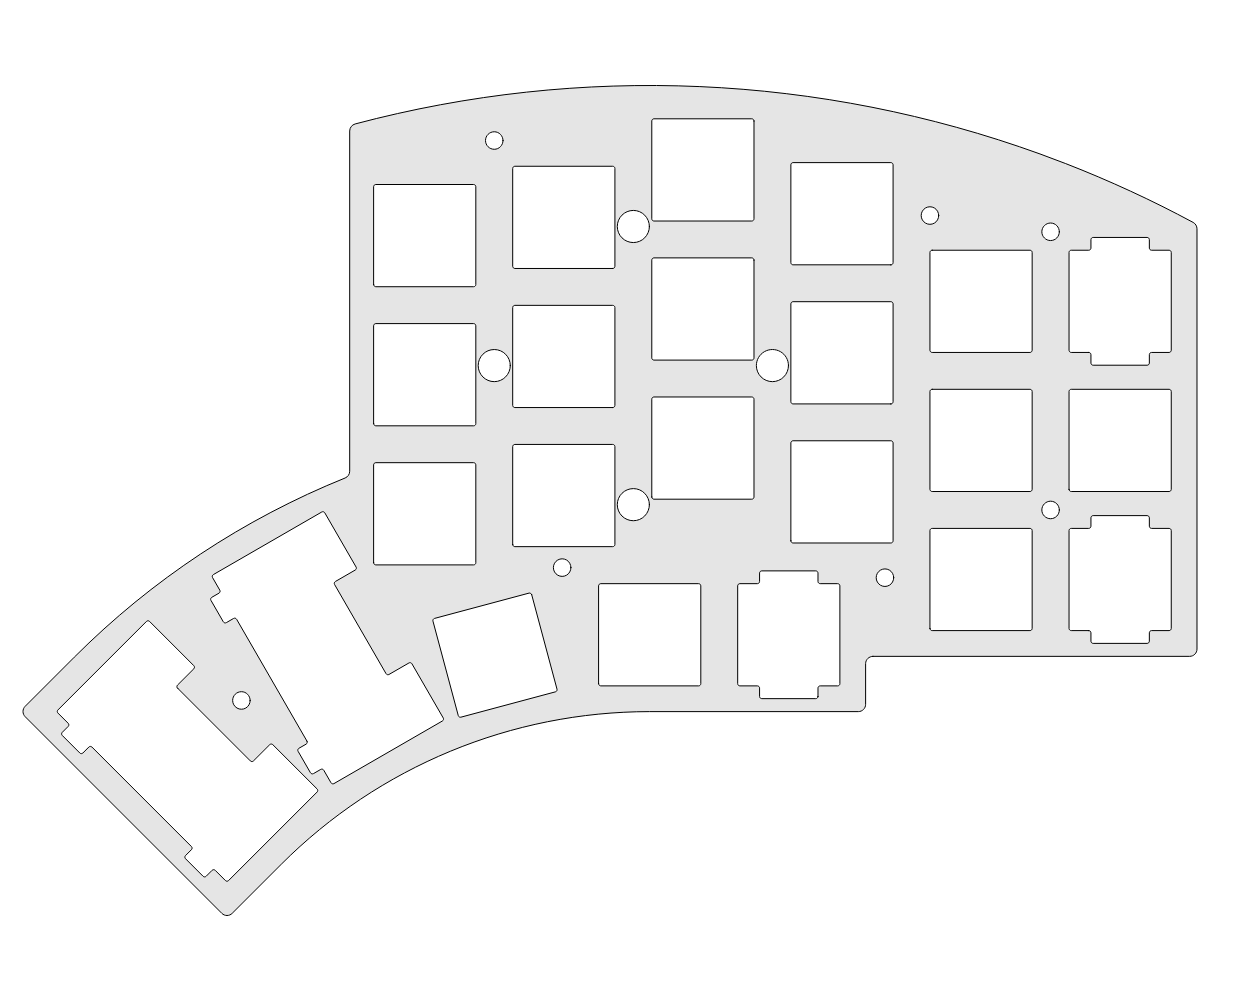
Note the four large round holes for the tenting puck screws, and the various weird-shaped key holes.
These weird-shaped holes exist so that you can install encoder knobs, or stabilizers for 2u thumb keys.
But I wasn’t planning on having any encoder knobs, and the Kyria isn’t even compatible with Choc 2u keys – which have a very different footprint than standard 2u keys.
So they’re sort of just wasted extra holes. So I took them out:
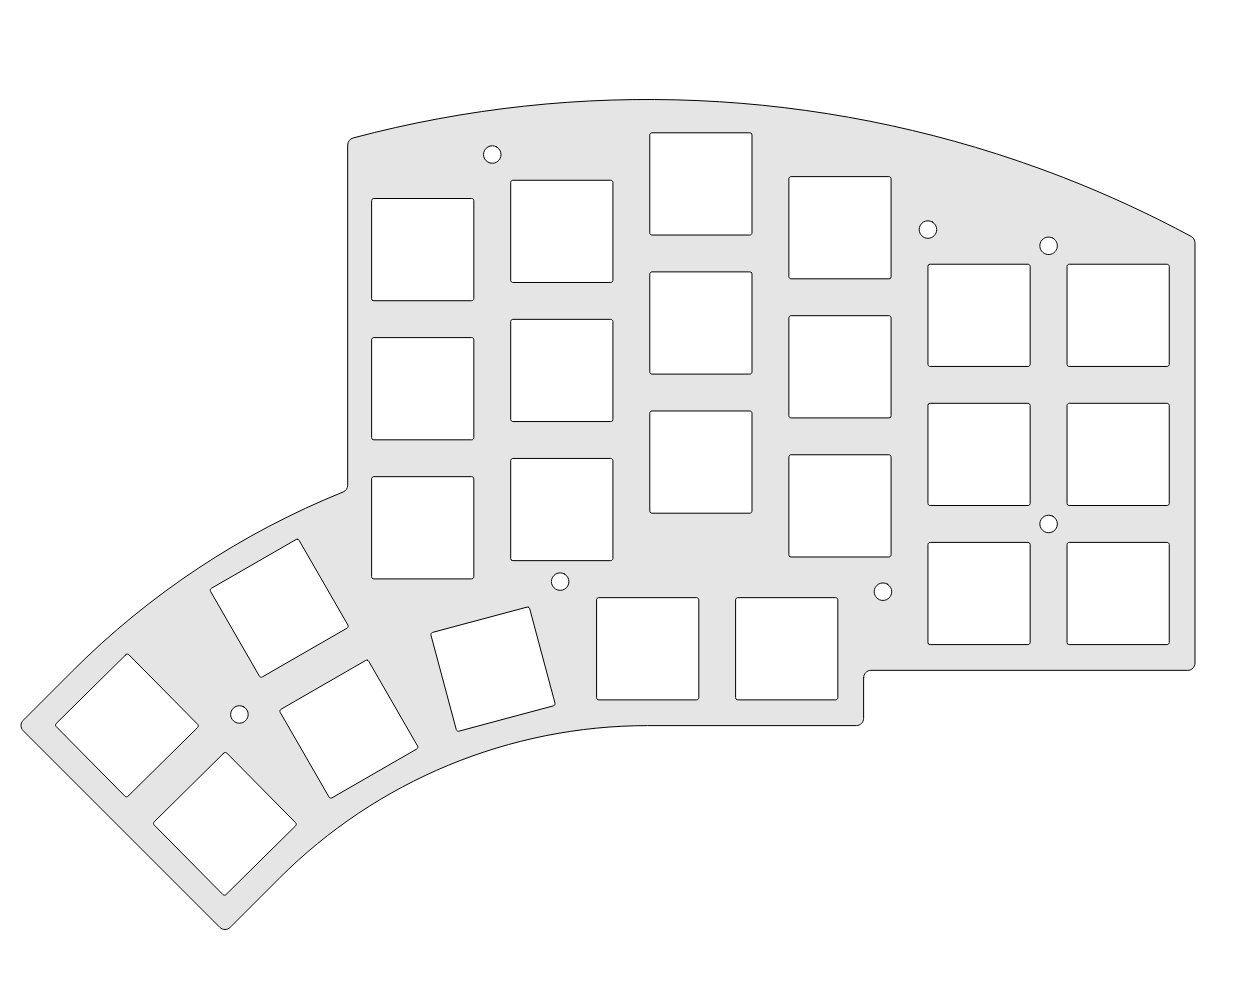
I did this by editing the DXF files in Inkscape, a free vector drawing program. Inkscape is sort of awful and there’s definitely a better way to do this, but it did work… eventually.
For the top plate, I just copied and pasted one of “regular” key cutouts, and then manually dragged that rectangle into place, eyeballing the rotation for the thumb keys. It was extremely janky and I felt very silly, but it ended up working perfectly.
I also wanted a better mounting solution than the Puck, so I made a custom bottom plate as well. I just drew some circles on top of the default plate:
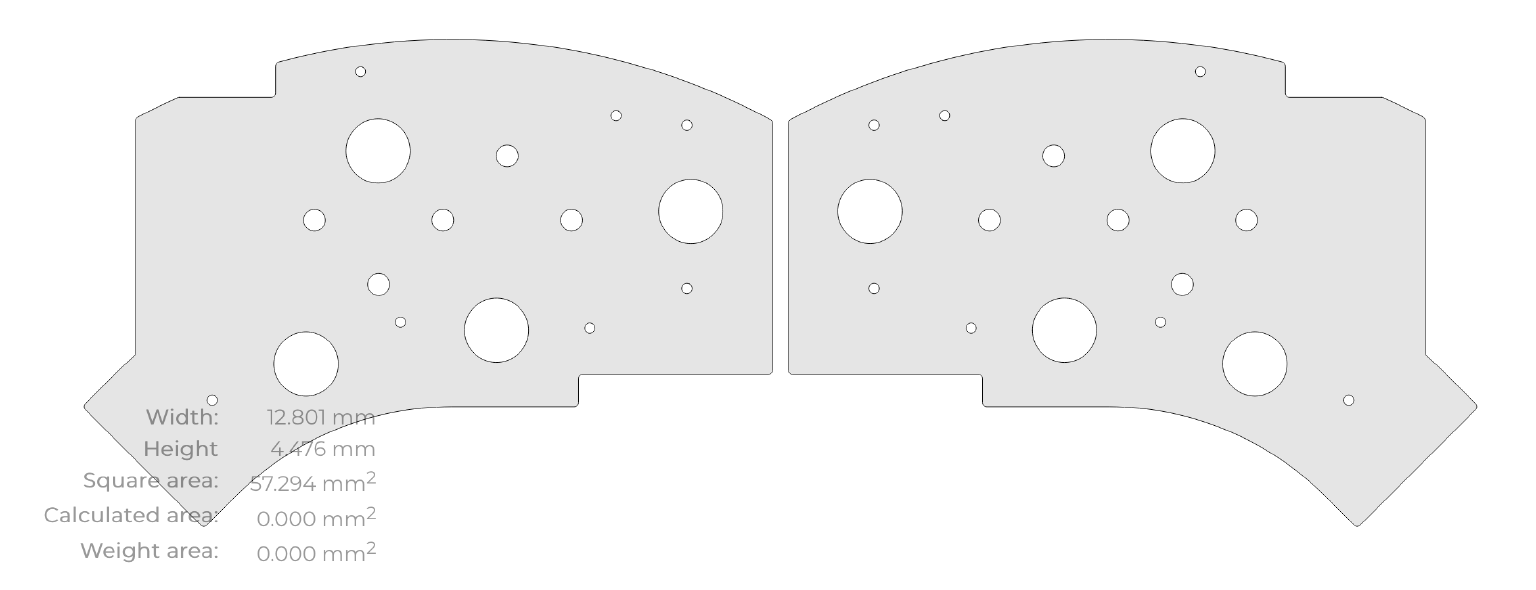
SendCutSend can do “tapping” for you – which just means putting threads into a hole so that they interlock with threaded screws. SendCutSend charges $3 per tapped hole, with a $29 minimum. So I put in ten holes for tripod mounts, even though I only really needed two. I’m glad I did this, though – the differently positioned holes allow for a wide range of pretty severe tenting/tilting options.
I also mirrored the part, instead of ordering two of the same thing, so that the threads would have the correct orientation on each half: if you ordered two identical plates and flipped one over, one of them would screw righty-tighty and the other would screw lefty-tighty. And that would drive me insane.
But it turns out that’s not… how threads work. Only the orientation of the screws matters; you can screw it in from either the “top” or the “bottom” of the plate. This seems like it shouldn’t work but, fortunately, my inability to reason in three dimensions has no bearing on reality.
I also put in some larger holes that I planned to glue some magnets into. I love magnets. Magnets are great.
How to edit DXF files in Inkscape
So I learned a few things in the course of doing this, and if you want to go this weird low-tech route without actually learning how to use any CAD software, you can learn them too.
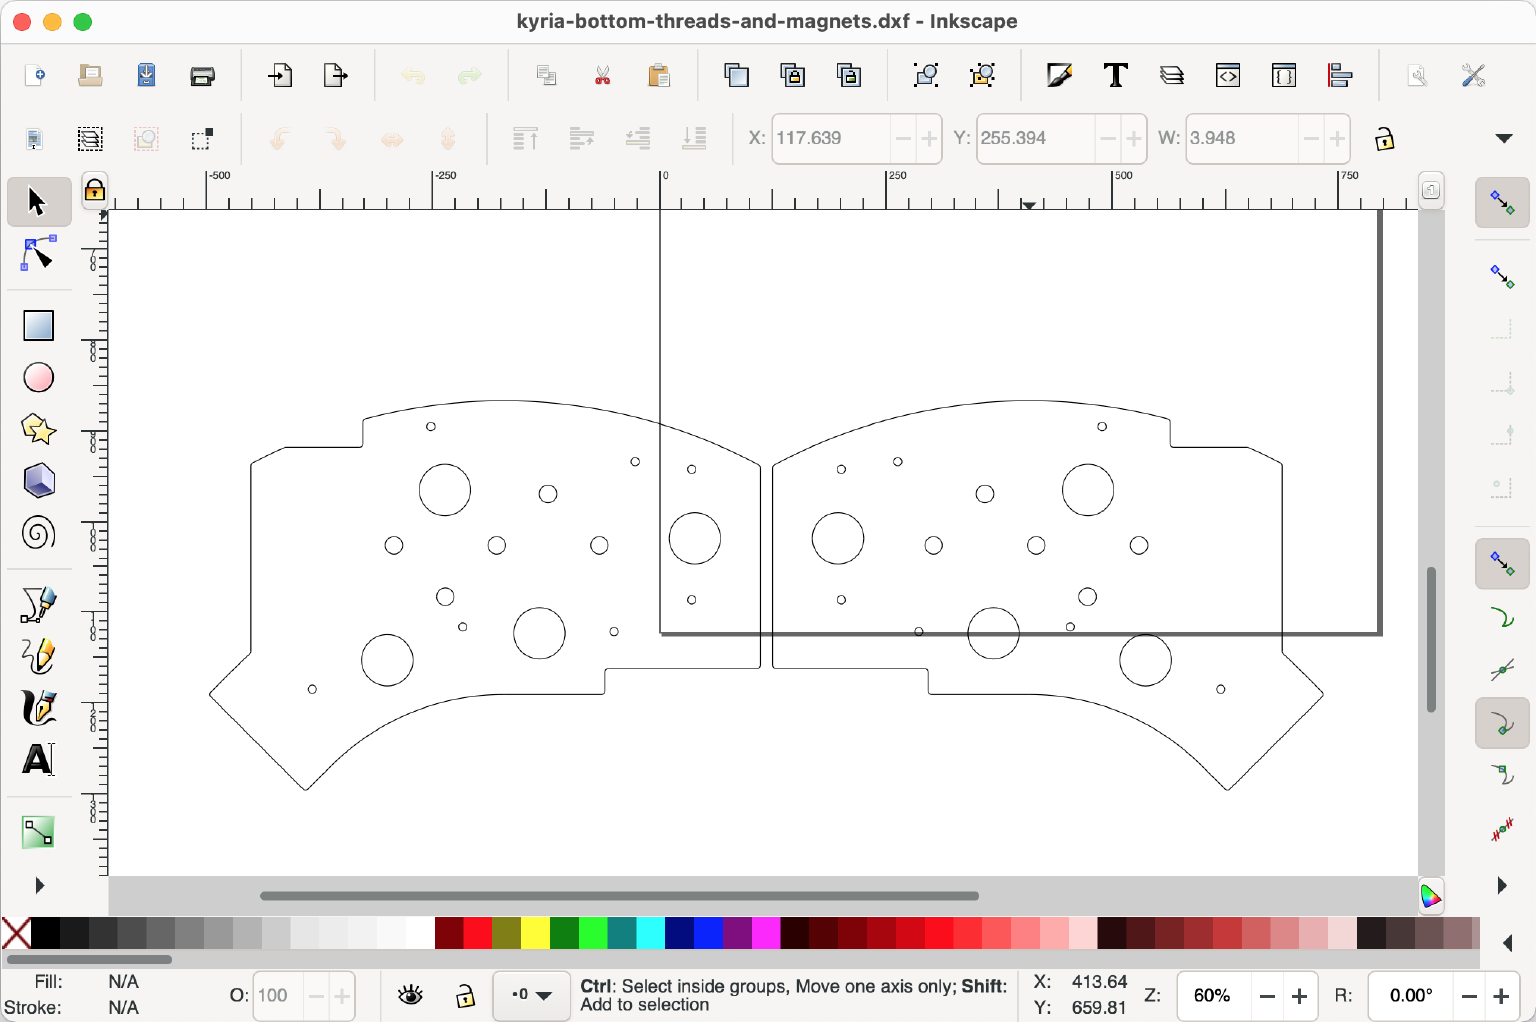
The first: Inkscape will, by default, weirdly mangle DXF files. Like, if you open a file and hit save, without making any changes, you will suddely have a file that is completely unrecognizable to SendCutSend. I don’t know why. I don’t know anything about this. Maybe the file is fine, and it’s SendCutSend’s fault. Maybe not. I don’t know.
The only way I found to get a working file again was to use “Save As” – there’s no “Export” – and then to change the format from “DXF R12” to “DXF R14.” And then it worked fine. No idea.
The other thing I learned has to do with nominal sizes.
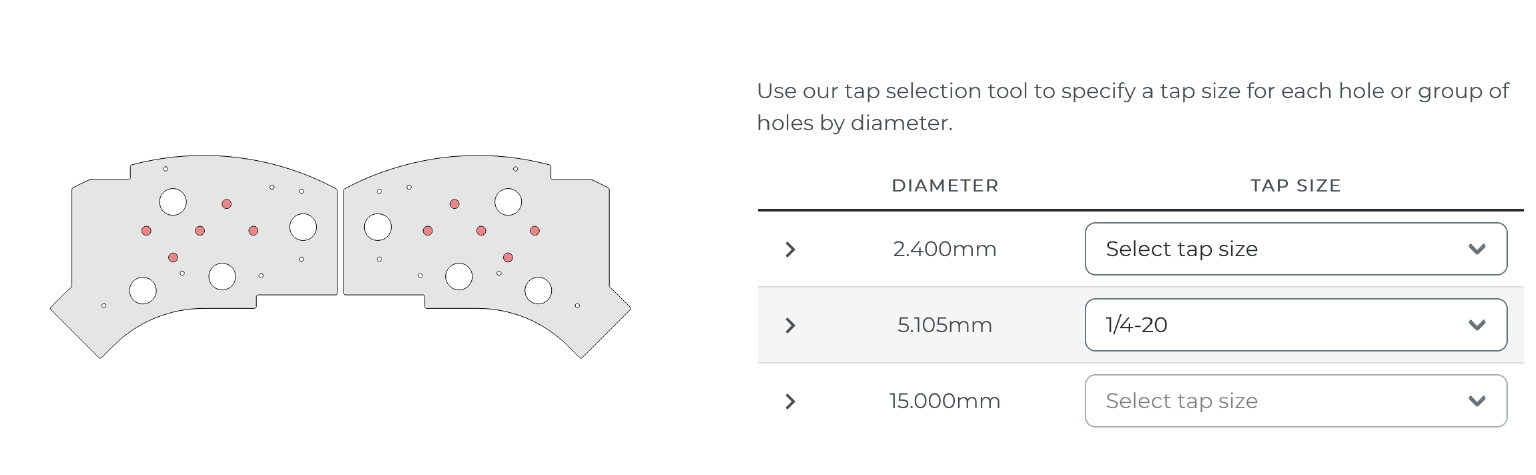
I drew some circles in the bottom plate, but you can’t just draw any holes and expect SendCutSend to tap them. The holes have to be exactly the right size, or the SendCutSend web interface thing won’t recognize them as “tappable.”
And for the longest time, I couldn’t get it to recognize mine.
The problem turned out to be two-fold. The first problem was a very dumb problem: when you open a DXF file, Inkscape will put a little stroke around all of your shapes:
SendCutSend ignores these strokes; I expect that they aren’t even present in the DXF files and Inkscape just adds them on import.
But they’re included in the size reported by Inkscape. So if you add a circle with a diameter of exactly 15mm, you’re actually making a circle that’s slightly smaller by the width of the stroke.
The solution is to turn off the stroke and use a fill color instead, and then you can exactly size elements in Inkscape.
Or, well, the real solution is to use something other than Inkscape for this, but it did work eventually so whatever.
But even after doing this, and doing lots of experiments to become quite confident that SendCutSend agreed with the sizes of the circles that I was making, it still wouldn’t let me tap a standard tripod mount hole.
The problem turned out to be very dumb: SendCutSend gives dimensions in imperial and in metric. But the metric dimensions appear to be rounded conversions of the imperial. But the SendCutSend software actually only cares about imperial sizes, and the rounded metric sizes are not recognizable.
So while SendCutSend claims that you should make a 0.201" or 5.11mm hole to tap for a standard 1/4-20 tripod screw, you actually need to make a 5.105mm hole – a more precise conversion of the imperial dimensions.
So that was fun. I reported this as a bug to SendCutSend, but the response I got was basically “uhh this sounds like an Inkscape problem” so I don’t know if it’s actually an issue on their end or mine.
Anyway.
I also made my new custom bottom plate thicker this time, because I wanted more thread engagement. So I got that plate in 4.7mm aluminum instead. It’s slightly more expensive than 3mm, but the tapping still cost more than the actual plates.
I had the top plate made out of stainless steel. This is pretty standard for keyboard plates, and I actually didn’t have much of an option anyway: it was the only suitable material that was available on SendCutSend with the right thickness.
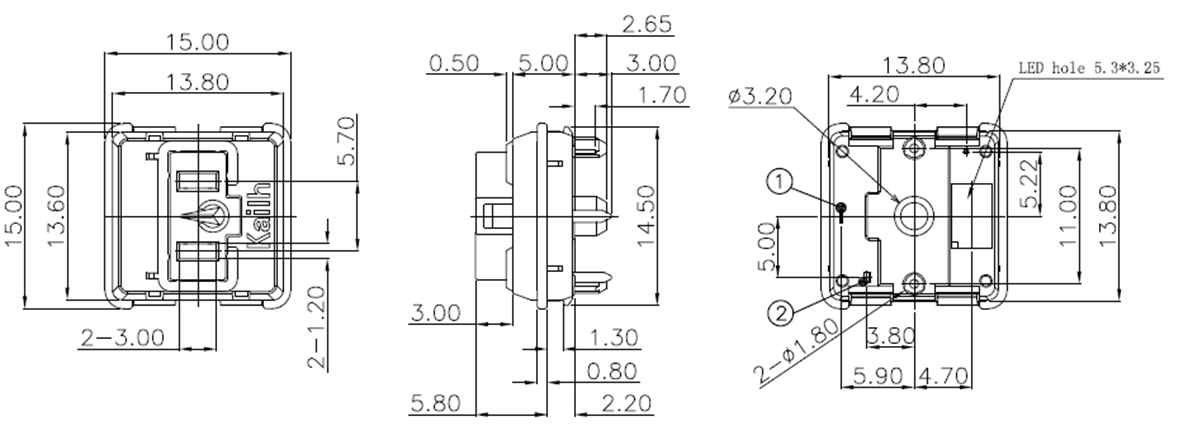
The technical drawings of Choc switches imply that you should use a 1.3mm plate:
Er…
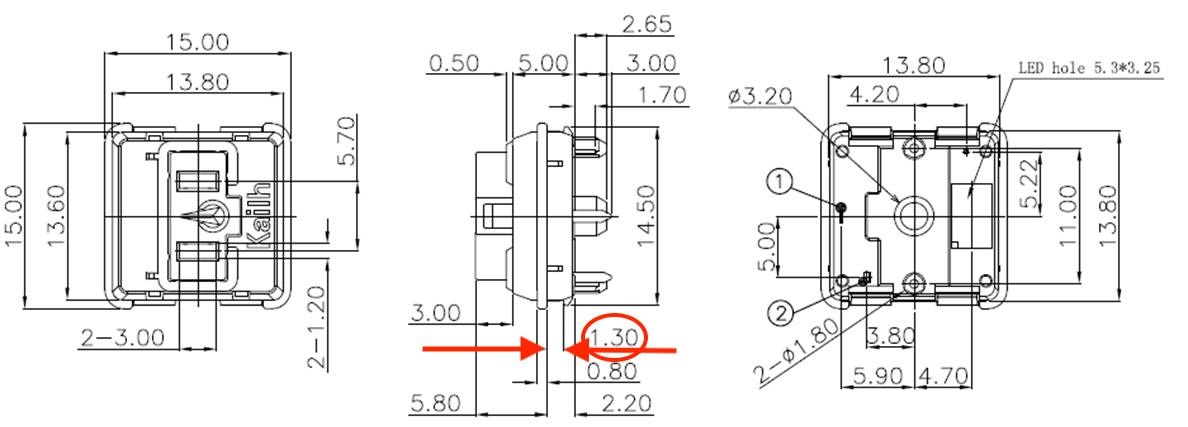
That’s better.
But SendCutSend can only do 1.2mm or 1.5mm stainless steel.

I went with 1.2mm, because I thought a slightly-loose switch would be better than a switch that might not fit at all.
Most metals – aluminum included – only come in 1mm or 1.6mm thicknesses. The only metal that SendCutSend has in 1.3mm is chromoly, a steel alloy that contains some chromium but not enough to earn the “stainless” moniker. Chromoly is magnetic, though – unlike stainless steel – so I was sort of afraid of that with my magnetic plans.
These plates were quite a bit more expensive than my original $6.38 test plates.
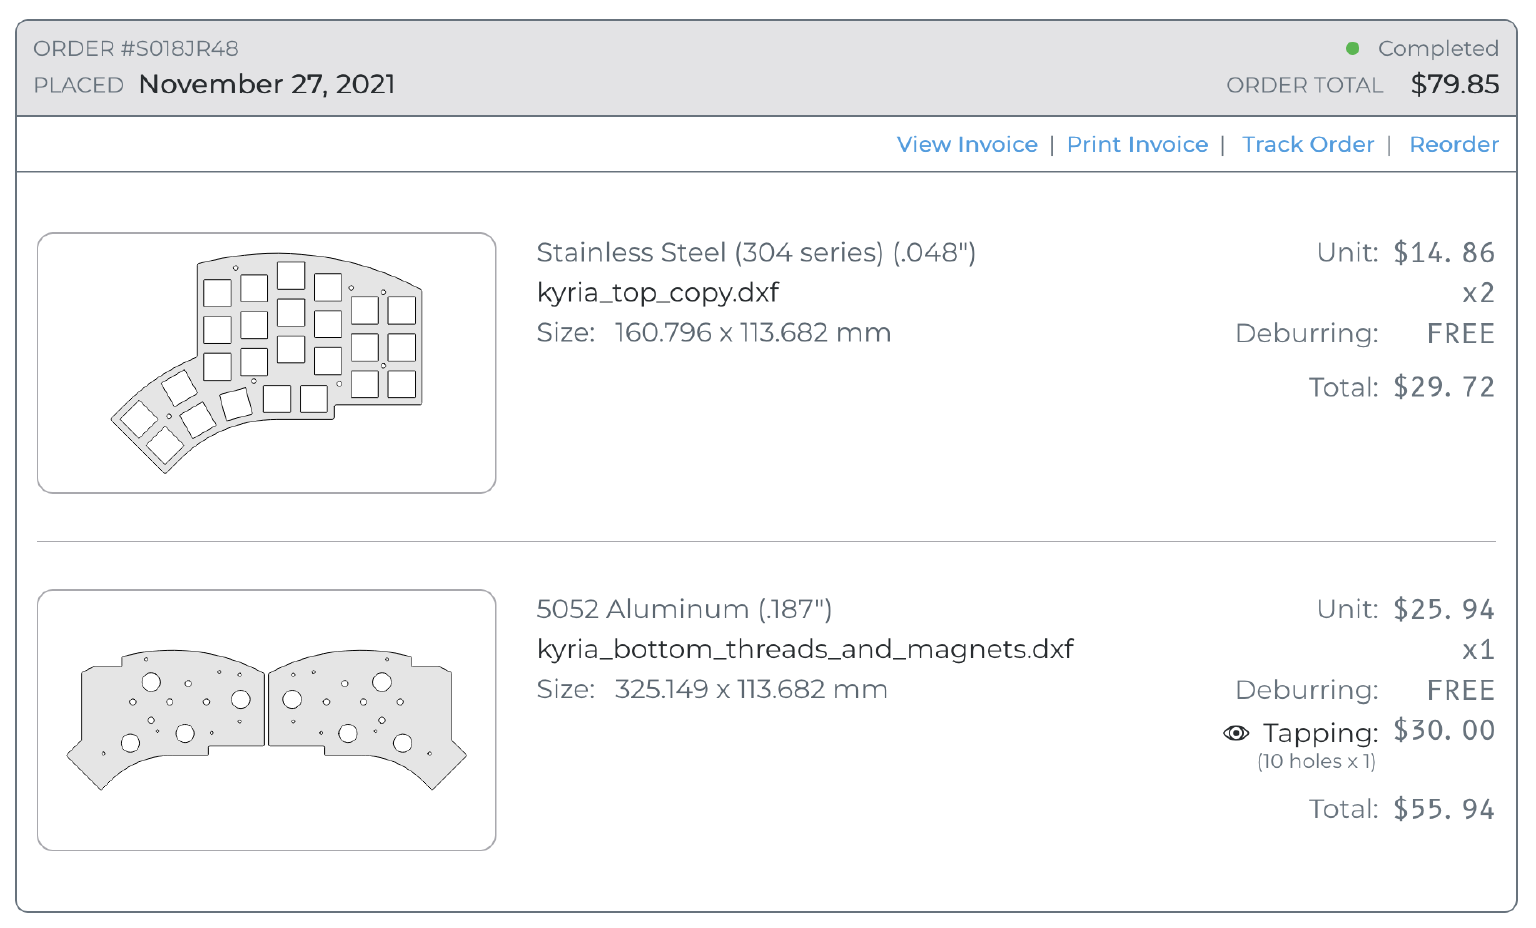
I used a 10% off coupon – SendCutSend loves giving out 10% off coupons; any time I left something in my cart for more than five minutes I got an email with a promo code in it – so the total came to $80.
For comparison, the acrylic plates and tenting pucks from splitbk.com came out to $60 with the current Euro exchange rate.
That’s not really a fair comparison, though, because I also had to buy new screws.1 The screws that came with the Kyria plate assumed a 3mm plate, and they weren’t long enough to get through a 4.7mm plate. So I had to buy some M2 screws as well, and I spent $15 on a pack of way too many screws because it was the only way I could get all the sizes I needed.

I got some black ones, because at this point I had decided to paint the whole case black, and I thought they would blend in. I think it looks pretty nice.
If I were doing this again, I’d try tapping the holes myself – you can buy a 1/4-20 tap for a lot less than $30, and aluminum is apparently pretty easy to tap by hand.
But I haven’t actually tried it. Maybe next time…
-
I didn’t actually have to get new screws – I could have countersunk the existing ones instead. But I thought that would be more work, and I was lazy. But then I ended up having to countersink them anyway for reasons that will be explained in a future post, so this was a pretty unnecessary expenditure. ↩︎